Centos7 搭建openstack ocata 版

一、openstack 介绍
OpenStack是一个由NASA(美国国家航空航天局)和Rackspace合作研发并发起的,以Apache许可证授权的自由软件和开放源代码项目。

OpenStack是一个开源的云计算管理平台项目,由几个主要的组件组合起来完成具体工作。OpenStack支持几乎所有类型的云环境,

项目目标是提供实施简单、可大规模扩展、丰富、标准统一的云计算管理平台。OpenStack通过各种互补的服务提供了基础设施即服务(IaaS)的解决方案,

每个服务提供API以进行集成。

OpenStack是一个旨在为公共及私有云的建设与管理提供软件的开源项目。它的社区拥有超过130家企业及1350位开发者,

这些机构与个人都将OpenStack作为基础设施即服务(IaaS)资源的通用前端。OpenStack项目的首要任务是简化云的部署过程并为其带来良好的可扩展性。

本文希望通过提供必要的指导信息,帮助大家利用OpenStack前端来设置及管理自己的公共云或私有云。

OpenStack云计算平台,帮助服务商和企业内部实现类似于 Amazon EC2 和 S3 的云基础架构服务(Infrastructure as a Service, IaaS)。

OpenStack 包含两个主要模块:Nova 和 Swift,前者是 NASA 开发的虚拟服务器部署和业务计算模块;后者是 Rackspace开发的分布式云存储模块,

两者可以一起用,也可以分开单独用。OpenStack除了有 Rackspace 和 NASA 的大力支持外,还有包括 Dell、Citrix、 Cisco、 Canonical等重量级公司的贡献和支持,

发展速度非常快,有取代另一个业界领先开源云平台 Eucalyptus 的态势。
https://docs.openstack.org/ocata/install-guide-rdo/glance-install.html
官方文档地址
二、基础环境
系统版本: Centos7.3  两块网卡(eth0,eth1)

机器的配置: 4G 50G硬盘(两块) 4个CPU

机器名: linux-node1(计算节点)

机器名: linux-node2(控制节点)

Node2 IP:eth0 192.168.57.145, eth1:192.168.57.146

Node1IP:  eth0: 192.168.57.142  eth1:192.168.57.143

主控制节点主要安装如下:(keystone、Glance、nova、networking、Dashboard)

计算节点主要安装如下:(nova、networking)
2.1 时间同步(node1 +node2 操作)
https://docs.openstack.org/ocata/install-guide-rdo/glance-install.html
node1
# yum install chrony
vim /etc/chrony.conf
设置
allow 192.168.57.0/24
####启动
[root@linux-node2 ~]# systemctl enable chronyd.service
[root@linux-node2 ~]#systemctl start chronyd.service
########node1 的时间先同步一下标准时间
[root@linux-node2 ~]# ntpdate pool.ntp.org
# chronyc sources
node2
修改主配置文件
vim /etc/chrony.conf
把所有行去掉
添加一行
Server 192.168.57.145 iburst
[root@linux-node2 ~]#systemctl start chronyd.service
# chronyc sources
2.2 安装mysql(node2主控制节点操作)
*配置一下mysql
添加文件/etc/my.cnf.d/openstack.cnf 内容如下:
 [mysqld]
bind-address = 192.168.57.145
default-storage-engine = innodb
innodb_file_per_table
collation-server =utf8_general_ci
init-connect = 'SET NAMES utf8'
character-set-server = utf8
重启一下mysql
[root@linux-node2 ~]# systemctl enable mariadb.service
[root@linux-node2 ~]# systemctl start mariadb.service
设置root密码
[root@linux-node2 ~]# mysql_secure_installation
创建数据库
[root@linux-node2 ~]# mysql -uroot -p123456 -e "Create database keystone;"
[root@linux-node2 ~]# mysql -uroot -p123456 -e "grant all privileges on keystone.* to 'keystone'@'%' identified by 'keystone'"
[root@linux-node2 ~]# mysql -uroot -p123456 -e "grant all privileges on keystone.* to 'keystone'@'localhost' identified by 'keystone'"
2.3 安装消息队列(node2控制节点操作)
# yum install rabbitmq-server
启动
# systemctl enable rabbitmq-server.service
# systemctl start rabbitmq-server.service
新建用户
# rabbitmqctl add_user openstack openstack
对用户授权
rabbitmqctl set_permissions openstack ".*" ".*" ".*"
查看插件
[root@linux-node2 ~]# rabbitmq-plugins list
[ ] amqp_client                       3.3.5
[ ] cowboy                            0.5.0-rmq3.3.5-git4b93c2d
[ ] eldap                             3.3.5-gite309de4
[ ] mochiweb                          2.7.0-rmq3.3.5-git680dba8
[ ] rabbitmq_amqp1_0                  3.3.5
[ ] rabbitmq_auth_backend_ldap        3.3.5
[ ] rabbitmq_auth_mechanism_ssl       3.3.5
[ ] rabbitmq_consistent_hash_exchange 3.3.5
[ ] rabbitmq_federation               3.3.5
[ ] rabbitmq_federation_management    3.3.5
[ ] rabbitmq_management               3.3.5
[ ] rabbitmq_management_agent         3.3.5
[ ] rabbitmq_management_visualiser    3.3.5
[ ] rabbitmq_mqtt                     3.3.5
[ ] rabbitmq_shovel                   3.3.5
[ ] rabbitmq_shovel_management        3.3.5
[ ] rabbitmq_stomp                    3.3.5
[ ] rabbitmq_test                     3.3.5
[ ] rabbitmq_tracing                  3.3.5
[ ] rabbitmq_web_dispatch             3.3.5
[ ] rabbitmq_web_stomp                3.3.5
[ ] rabbitmq_web_stomp_examples       3.3.5
[ ] sockjs                            0.3.4-rmq3.3.5-git3132eb9
[ ] webmachine                        1.10.3-rmq3.3.5-gite9359c7
启用web插件
[root@linux-node2 ~]# rabbitmq-plugins enable rabbitmq_management
重启一下
[root@linux-node2 ~]# systemctl restart rabbitmq-server.service
检查是否启动成功
[root@linux-node2 ~]# netstat -nltp |grep 5672
tcp        0      0 0.0.0.0:15672           0.0.0.0:*               LISTEN      16686/beam.smp
tcp        0      0 0.0.0.0:25672           0.0.0.0:*               LISTEN      16686/beam.smp
tcp6       0      0 :::5672                 :::*                    LISTEN      16686/beam.smp
[root@linux-node2 ~]#
Web访问
http://192.168.57.138:15672/#/
用户名密码为guest
三、搭建openstack
3.1 安装keystone 组件介绍
Keystone功能:
1. 用户与认证: 用户权限与用户行为跟踪
2. 服务目录:提供一个服务目录、包括所有服务项与相关API的端点
Keystone名词:
User: 用户
Tenant: 租户/项目
Token: 令牌
Role: 角色
Service: 服务
Endpoint: 端点
3.2 安装keystone 组件(node2 主控制节点操作)
安装openstack最新的源:
    #yum install centos-release-openstack-ocata
    #yum install https://rdoproject.org/repos/rdo-release.rpm
    #yum upgrade                                               (在主机上升级包)
    #yum install python-openstackclient            (安装opentack必须的插件)
    #yum install openstack-selinux                    (可选则安装这个插件,我直接关闭了selinux,因为不熟,对后续不会有影响)
 [root@linux-node1 home]# yum install openstack-keystone httpd mod_wsgi
3.2.1修改配置文件
vim /etc/keystone/keystone.conf
[database]
connection = mysql://keystone:keystone@192.168.57.145/keystone
[token]
provider = fernet
3.2.2同步数据库
su -s /bin/sh -c "keystone-manage db_sync" keystone
###为什么需要su 一下呢?因为在写日志的时候文件是放在/var/log/keystone 这个下面如果是root用户执行的话。那么写日志的时候就会写不进去。
验证一下是否成功。进入数据库查看有没有表的建立。
MariaDB [keystone]> show tables;
+------------------------+
| Tables_in_keystone     |
初始化
# keystone-manage fernet_setup --keystone-user keystone --keystone-group keystone
# keystone-manage credential_setup --keystone-user keystone --keystone-group keystone
引导身份信息
keystone-manage bootstrap --bootstrap-password admin \
  --bootstrap-admin-url http://linux-node2:35357/v3/ \
  --bootstrap-internal-url http://linux-node2:5000/v3/ \
  --bootstrap-public-url http://linux-node2:5000/v3/ \
  --bootstrap-region-id RegionOne
3.2.3配置memcache的配置 (/etc/sysconfig/memcached)
vim /etc/sysconfig/memcached
OPTIONS="-l 127.0.0.1,::1,192.168.57.145"
3.2.4启动memcache
[root@linux-node2 ~]# systemctl start memcached.service
 [root@linux-node2 ~]# netstat -nltp|grep 121
tcp        0      0 0.0.0.0:11211           0.0.0.0:*               LISTEN      20054/memcached
tcp6       0      0 :::11211                :::*                    LISTEN      20054/memcached
3.2.5设置apache
ln -s /usr/share/keystone/wsgi-keystone.conf /etc/httpd/conf.d/
3.2.6修改主apache的主配置文件
vim /etc/httpd/conf/httpd.conf
配置一下Servername
ServerName 192.168.57.145:80
3.2.7启动apache
systemctl enable httpd.service
systemctl start httpd.service
3.2.8检查一下是否启动成功了
[root@linux-node2 conf.d]# netstat -nltp|grep httpd
tcp6       0      0 :::80                   :::*                    LISTEN      20253/httpd
tcp6       0      0 :::35357                :::*                    LISTEN      20253/httpd
tcp6       0      0 :::5000                 :::*                    LISTEN      20253/httpd
[root@linux-node2 conf.d]#
3.3 keystone 用户权限
3.3.1 设置环境变量
$ export OS_USERNAME=admin
$ export OS_PASSWORD=admin
$ export OS_PROJECT_NAME=admin
$ export OS_USER_DOMAIN_NAME=Default
$ export OS_PROJECT_DOMAIN_NAME=Default
$ export OS_AUTH_URL=http://linux-node2:35357/v3
$ export OS_IDENTITY_API_VERSION=3
3.3.2创建域、项目、用户和角色
创建服务
[root@linux-node2 ~]# openstack project create --domain default --description "Service Project" service
创建demo项目
 [root@linux-node2 ~]# openstack project create --domain default \
> --description "Demo Project" demo
设置demo密码
[root@linux-node2 ~]# openstack user create --domain default \
> --password-prompt demo
创建用户组
 [root@linux-node2 ~]# openstack role create user
加入用户组
 [root@linux-node2 ~]# openstack role add --project demo --user demo user
3.3.3验证操作
1. 出于安全原因,请禁用临时身份验证令牌机制: ( 这个可以不操作)
编辑/etc/keystone/keystone-paste.ini 文件并删除admin_token_auth从 [pipeline:public_api],[pipeline:admin_api]和[pipeline:api_v3]段。
2、取消设置临时 变量OS_AUTH_URL和OS_PASSWORD环境变量:
[root@linux-node2 ~]# unset OS_AUTH_URL OS_PASSWORD
3、作为admin 、请求身份验证令牌
$ openstack --os-auth-url http://linux-node2:35357/v3 \
  --os-project-domain-name default --os-user-domain-name default \
  --os-project-name admin --os-username admin token issue
Password:
+------------+-----------------------------------------------------------------+
| Field      | Value                                                           |
+------------+-----------------------------------------------------------------+
| expires    | 2016-02-12T20:14:07.056119Z                                     |
| id         | gAAAAABWvi7_B8kKQD9wdXac8MoZiQldmjEO643d-e_j-XXq9AmIegIbA7UHGPv |
|            | atnN21qtOMjCFWX7BReJEQnVOAj3nclRQgAYRsfSU_MrsuWb4EDtnjU7HEpoBb4 |
|            | o6ozsA_NmFWEpLeKy0uNn_WeKbAhYygrsmQGA49dclHVnz-OMVLiyM9ws       |
| project_id | 343d245e850143a096806dfaefa9afdc                                |
| user_id    | ac3377633149401296f6c0d92d79dc16                                |
+------------+-----------------------------------------------------------------+
4、用demo用户、请求验证令牌
$ openstack --os-auth-url http://linux-node2:5000/v3 \
  --os-project-domain-name default --os-user-domain-name default \
  --os-project-name demo --os-username demo token issue
Password:
+------------+-----------------------------------------------------------------+
| Field      | Value                                                           |
+------------+-----------------------------------------------------------------+
| expires    | 2016-02-12T20:15:39.014479Z                                     |
| id         | gAAAAABWvi9bsh7vkiby5BpCCnc-JkbGhm9wH3fabS_cY7uabOubesi-Me6IGWW |
|            | yQqNegDDZ5jw7grI26vvgy1J5nCVwZ_zFRqPiz_qhbq29mgbQLglbkq6FQvzBRQ |
|            | JcOzq3uwhzNxszJWmzGC7rJE_H0A_a3UFhqv8M4zMRYSbS2YF0MyFmp_U       |
| project_id | ed0b60bf607743088218b0a533d5943f                                |
| user_id    | 58126687cbcc4888bfa9ab73a2256f27                                |
3.3.4创建 OpenStack 客户端环境脚本
vi admin-openrc 加入如下:
export OS_PROJECT_DOMAIN_NAME=Default
export OS_USER_DOMAIN_NAME=Default
export OS_PROJECT_NAME=admin
export OS_USERNAME=admin
export OS_PASSWORD=ADMIN_PASS
export OS_AUTH_URL=http://linux-node2:35357/v3
export OS_IDENTITY_API_VERSION=3
export OS_IMAGE_API_VERSION=2
#vi demo-openrc 加入:
[root@linux-node2 ~]# cat demo-openrc
export OS_PROJECT_DOMAIN_NAME=Default
export OS_USER_DOMAIN_NAME=Default
export OS_PROJECT_NAME=demo
export OS_USERNAME=demo
export OS_PASSWORD=demo
export OS_AUTH_URL=http://linux-node2:5000/v3
export OS_IDENTITY_API_VERSION=3
export OS_IMAGE_API_VERSION=2
四:镜像服务Glance(node2 主控制节点操作)
4.1 Glance 介绍
Glance 主要由三个部分构成: glance-api、glance-registry 以 image stroe
Glance-api:接受云系统镜像创建、删除、读取请求
Glance-Registry: 云系统镜像注册服务
4.2 mysql 配置
$ mysql -u root –p
MariaDB [(none)]> CREATE DATABASE glance;
MariaDB [(none)]> GRANT ALL PRIVILEGES ON glance.* TO 'glance'@'localhost' \
  IDENTIFIED BY 'glance';
MariaDB [(none)]> GRANT ALL PRIVILEGES ON glance.* TO 'glance'@'%' \
  IDENTIFIED BY 'glance';
4.3 Glance安装
# yum install openstack-glance
4.4修改主配置文件/etc/glance/glance-api.conf
[database]
# ...
connection = mysql://glance:glance@192.168.57.145/glance


在[keystone_authtoken]和[paste_deploy]部分中,配置身份服务访问:
[keystone_authtoken]
auth_uri  =  http://linux-node2:5000
auth_url  =  http://linux-node2:35357
memcached_servers  =  linux-node2:11211
auth_type  =  password
project_domain_name  =  default
user_domain_name  =  default
project_name  =  service
username  =  glance
password  =  glance    #########这里的密码就是下面的新建 API  glance用户的密码
#...
[paste_deploy]
flavor  =  keystone
[glance_store]
# ...
stores = file,http
default_store = file
filesystem_store_datadir = /var/lib/glance/images/
4.5 修改主配置文件/etc/glance/glance-registry.conf
[database]
# ...
connection = mysql://glance:glance@192.168.57.145/glance
在[keystone_authtoken]和[paste_deploy]部分中,配置身份服务访问:
[keystone_authtoken]
auth_uri  =  http://linux-node2:5000
auth_url  =  http://linux-node2:35357
memcached_servers  =  linux-node2:11211
auth_type  =  password
project_domain_name  =  default
user_domain_name  =  default
project_name  =  service
username  =  glance
password  =  glance  #########这里的密码就是下面的新建 API  glance用户的密码
#...
[paste_deploy]
flavor  =  keystone
4.6 设置数据库
# su -s /bin/sh -c "glance-manage db_sync" glance
4.7创建镜像服务的API服务
$ openstack user create --domain default --password-prompt glance
$ openstack role add --project service --user glance admin
$ openstack service create --name glance \
  --description "OpenStack Image" image
$ openstack endpoint create --region RegionOne \
  image public http://linux-node2:9292
$ openstack endpoint create --region RegionOne \
  image internal http://linux-node2:9292
$ openstack endpoint create --region RegionOne \
  image admin http://linux-node2:9292
4.8 启动服务
# systemctl enable openstack-glance-api.service \
  openstack-glance-registry.service
# systemctl start openstack-glance-api.service \
  openstack-glance-registry.service
4.9验证
运行环境变量:
  #. admin-openrc
  下载一个比较小的镜像:
  #wget http://download.cirros-cloud.net/0.3.5/cirros-0.3.5-x86_64-disk.img
一、上传文件
$ openstack image create "cirros" \
  --file cirros-0.3.5-x86_64-disk.img \
  --disk-format qcow2 --container-format bare \
  --public
+------------------+------------------------------------------------------+
| Field            | Value                                                |
+------------------+------------------------------------------------------+
| checksum         | 133eae9fb1c98f45894a4e60d8736619                     |
| container_format | bare                                                 |
| created_at       | 2015-03-26T16:52:10Z                                 |
| disk_format      | qcow2                                                |
| file             | /v2/images/cc5c6982-4910-471e-b864-1098015901b5/file |
| id               | cc5c6982-4910-471e-b864-1098015901b5                 |
| min_disk         | 0                                                    |
| min_ram          | 0                                                    |
| name             | cirros                                               |
| owner            | ae7a98326b9c455588edd2656d723b9d                     |
| protected        | False                                                |
| schema           | /v2/schemas/image                                    |
| size             | 13200896                                             |
| status           | active                                               |
| tags             |                                                      |
| updated_at       | 2015-03-26T16:52:10Z                                 |
| virtual_size     | None                                                 |
| visibility       | public                                               |
+------------------+------------------------------------------------------+
二、查看
$ openstack image list

+--------------------------------------+--------+--------+
| ID                                   | Name   | Status |
+--------------------------------------+--------+--------+
| 38047887-61a7-41ea-9b49-27987d5e8bb9 | cirros | active |
+--------------------------------------+--------+--------+
有输出证明glance配置正确
五、计算服务一 nova(node2控制节点操作)
5 .Nova 作用
1. API :负责接收和相应外部请求、支持 openstack API Ec2API
2. Cert:负责身份认证
3. Scheduler:用于云主机调度
4. Conductor: 计算节点访问数据的中间件
5. Consoleaut:用于控制台的授权验证
6. NovncProxy: VNC代理
5.1 新建数据库
$ mysql -u root –p
MariaDB [(none)]> CREATE DATABASE nova_api;
MariaDB [(none)]> CREATE DATABASE nova;
MariaDB [(none)]> CREATE DATABASE nova_cell0;
新建用户
MariaDB [(none)]> GRANT ALL PRIVILEGES ON nova_api.* TO 'nova'@'%' \
  IDENTIFIED BY 'nova';
MariaDB [(none)]> GRANT ALL PRIVILEGES ON nova.* TO 'nova'@'localhost' \
  IDENTIFIED BY 'nova';
MariaDB [(none)]> GRANT ALL PRIVILEGES ON nova_cell0.* TO 'nova'@'%' \
  IDENTIFIED BY 'nova';
5.2创建nova用户:
# . admin-openrc

openstack user create --domain default --password-prompt nova
User Password: nova
Repeat User Password: nova
The passwords entered were not the same
User Password: nova
Repeat User Password:  nova
+---------------------+----------------------------------+
| Field               | Value                            |
+---------------------+----------------------------------+
| domain_id           | default                          |
| enabled             | True                             |
| id                  | b9878680c70a4a678fd9a7a580706ccf |
| name                | nova                             |
| options             | {}                               |
| password_expires_at | None                             |
+---------------------+----------------------------------+
[root@linux-node2 ~]#
加入组
[root@linux-node2 ~]# openstack role add --project service --user nova admin
5.3创建nova服务实体
$ openstack service create --name nova \
  --description "OpenStack Compute" compute

+-------------+----------------------------------+
| Field       | Value                            |
+-------------+----------------------------------+
| description | OpenStack Compute                |
| enabled     | True                             |
| id          | 060d59eac51b4594815603d75a00aba2 |
| name        | nova                             |
| type        | compute                          |
+-------------+----------------------------------+
5.4创建服务API
[root@linux-node2 ~]# openstack endpoint create --region RegionOne \
>   compute public http://linux-node2:8774/v2.1
+--------------+----------------------------------+
| Field        | Value                            |
+--------------+----------------------------------+
| enabled      | True                             |
| id           | b6ebf975780344a597a65650eafdf67a |
| interface    | public                           |
| region       | RegionOne                        |
| region_id    | RegionOne                        |
| service_id   | d6a1591a15944bea85ab1e203af6732c |
| service_name | nova                             |
| service_type | compute                          |
| url          | http://linux-node2:8774/v2.1     |
+--------------+----------------------------------+
[root@linux-node2 ~]# openstack endpoint create --region RegionOne \
>   compute internal http://linux-node2:8774/v2.1
+--------------+----------------------------------+
| Field        | Value                            |
+--------------+----------------------------------+
| enabled      | True                             |
| id           | a2c1af804a31484cb3d82017b15fa47f |
| interface    | internal                         |
| region       | RegionOne                        |
| region_id    | RegionOne                        |
| service_id   | d6a1591a15944bea85ab1e203af6732c |
| service_name | nova                             |
| service_type | compute                          |
| url          | http://linux-node2:8774/v2.1     |
+--------------+----------------------------------+
[root@linux-node2 ~]# openstack endpoint create --region RegionOne \
>   compute admin http://linux-node2:8774/v2.1
+--------------+----------------------------------+
| Field        | Value                            |
+--------------+----------------------------------+
| enabled      | True                             |
| id           | 0304b6e92bf049d09e7d28bacfb1ed16 |
| interface    | admin                            |
| region       | RegionOne                        |
| region_id    | RegionOne                        |
| service_id   | d6a1591a15944bea85ab1e203af6732c |
| service_name | nova                             |
| service_type | compute                          |
| url          | http://linux-node2:8774/v2.1     |
+--------------+----------------------------------+
5.5新建另一个用户
[root@linux-node2 ~]# openstack user create --domain default --password-prompt placement
User Password: nova
Repeat User Password: nova
+---------------------+----------------------------------+
| Field               | Value                            |
+---------------------+----------------------------------+
| domain_id           | default                          |
| enabled             | True                             |
| id                  | 1654b6d199bf4fc582d1e70db802a31a |
| name                | placement                        |
| options             | {}                               |
| password_expires_at | None                             |
+---------------------+----------------------------------+
[root@linux-node2 ~]#
加入管理员组
[root@linux-node2 ~]# openstack role add --project service --user placement admin
5.6在服务目录中创建Placement API条目:
$ openstack service create --name placement --description "Placement API" placement
+-------------+----------------------------------+
| Field       | Value                            |
+-------------+----------------------------------+
| description | Placement API                    |
| enabled     | True                             |
| id          | 2d1a27022e6e4185b86adac4444c495f |
| name        | placement                        |
| type        | placement                        |
+-------------+----------------------------------+
5.7创建Placement API服务端点:
[root@linux-node2 ~]#  openstack endpoint create --region RegionOne placement public http://linux-node2:8778
+--------------+----------------------------------+
| Field        | Value                            |
+--------------+----------------------------------+
| enabled      | True                             |
| id           | 4b82fb4b30de4228982dea8c663f6d26 |
| interface    | public                           |
| region       | RegionOne                        |
| region_id    | RegionOne                        |
| service_id   | ba2a8b23524a4635af583cbfc80abd91 |
| service_name | placement                        |
| service_type | placement                        |
| url          | http://linux-node2:8778          |
+--------------+----------------------------------+
[root@linux-node2 ~]# openstack endpoint create --region RegionOne placement internal http://linux-node2:8778
+--------------+----------------------------------+
| Field        | Value                            |
+--------------+----------------------------------+
| enabled      | True                             |
| id           | bea3dbb6003d4cea802527de411f8cde |
| interface    | internal                         |
| region       | RegionOne                        |
| region_id    | RegionOne                        |
| service_id   | ba2a8b23524a4635af583cbfc80abd91 |
| service_name | placement                        |
| service_type | placement                        |
| url          | http://linux-node2:8778          |
+--------------+----------------------------------+
[root@linux-node2 ~]# openstack endpoint create --region RegionOne placement admin http://linux-node2:8778
+--------------+----------------------------------+
| Field        | Value                            |
+--------------+----------------------------------+
| enabled      | True                             |
| id           | b5d6d62d8f3f4e7c9ee2d6241b832bc5 |
| interface    | admin                            |
| region       | RegionOne                        |
| region_id    | RegionOne                        |
| service_id   | ba2a8b23524a4635af583cbfc80abd91 |
| service_name | placement                        |
| service_type | placement                        |
| url          | http://linux-node2:8778          |
+--------------+----------------------------------+
5.8安装和配置的部件
# yum install openstack-nova-api openstack-nova-conductor \
  openstack-nova-console openstack-nova-novncproxy \
  openstack-nova-scheduler openstack-nova-placement-api
5.9修改配置文件 /etc/nova/nova.conf
[DEFAULT]
# ...
enabled_apis = osapi_compute,metadata
 [api_database]
connection=mysql://nova:nova@192.168.57.145/nova_api
[database]
connection=connection=mysql://nova:nova@192.168.57.145/nova
[DEFAULT]
# ...
transport_url = rabbit://openstack:openstack@192.168.57.145
5.10设置api和连接信息
[api]
# ...
auth_strategy = keystone
[keystone_authtoken]
# ...
auth_uri = http://linux-node2:5000
auth_url = http://linux-node2:35357
memcached_servers = linux-node2:11211
auth_type = password
project_domain_name = default
user_domain_name = default
project_name = service
username = nova
password = nova

设置IP
[DEFAULT]
# ...
my_ip = 192.168.57.145
[DEFAULT]
# ...
use_neutron = True
firewall_driver = nova.virt.firewall.NoopFirewallDriver
[vnc]
enabled = true
# ...
vncserver_listen = $my_ip
vncserver_proxyclient_address = $my_ip
5.11设置glance
[glance]
# ...
api_servers = http://linux-node2:9292
5.12设置[oslo_concurrency]
[oslo_concurrency]
# ...
lock_path = /var/lib/nova/tmp
5.13设置[placement]
[placement]
# ...
 os_region_name = RegionOne
project_domain_name = Default
project_name = service
auth_type = password
user_domain_name = Default
auth_url = http://linux-node2:35357/v3
username = placement
password = nova
5.14设置apache
vim /etc/httpd/conf.d/00-nova-placement-api.conf:
<Directory /usr/bin>
   <IfVersion >= 2.4>
      Require all granted
   </IfVersion>
   <IfVersion < 2.4>
      Order allow,deny
      Allow from all
   </IfVersion>
</Directory>
5.15重启apache
# systemctl restart httpd
填充nova-api数据库:
# su -s /bin/sh -c "nova-manage api_db sync" nova
注册cell0数据库:
# su -s /bin/sh -c "nova-manage cell_v2 map_cell0" nova
创建cell1单元格:
# su -s /bin/sh -c "nova-manage cell_v2 create_cell --name=cell1 --verbose" nova
109e1d4b-536a-40d0-83c6-5f121b82b650
填充nova数据库:
# su -s /bin/sh -c "nova-manage db sync" nova
5.17验证
验证nova cell0和cell1是否正确注册:
# nova-manage cell_v2 list_cells
 + ------- + ----------------------------------- --- +
| 名称| UUID |
+ ------- + -------------------------------------- +
| cell1 | 109e1d4b-536a-40d0-83c6-5f121b82b650 |
| cell0 | 00000000-0000-0000-0000-000000000000 |
+ ------- + -------------------------------------- +
设置开机自启动
[root@linux-node2 nova]# systemctl enable openstack-nova-api.service
[root@linux-node2 nova]# systemctl enable openstack-nova-consoleauth.service
[root@linux-node2 nova]# systemctl enable openstack-nova-scheduler.service
[root@linux-node2 nova]# systemctl enable openstack-nova-conductor.service
[root@linux-node2 nova]# systemctl enable openstack-nova-novncproxy.service
[root@linux-node2 nova]#
启动服务
[root@linux-node2 nova]# systemctl start openstack-nova-api.service
[root@linux-node2 nova]# systemctl start openstack-nova-consoleauth.service
[root@linux-node2 nova]# systemctl start openstack-nova-scheduler.service
[root@linux-node2 nova]# systemctl start openstack-nova-conductor.service
[root@linux-node2 nova]# systemctl start openstack-nova-novncproxy.service
六、计算服务二 nova(node1计算节点操作)
6.1安装nova-compute
# yum install openstack-nova-compute
6.2配置主配置文件(/etc/nova/nova.conf)
[DEFAULT]
# ...
enabled_apis = osapi_compute,metadata
[DEFAULT]
# ...
transport_url = rabbit://openstack:openstack@192.168.57.145
[api]
# ...
auth_strategy = keystone

[keystone_authtoken]
# ...
auth_uri = http://linux-node2:5000
auth_url = http://linux-node2:35357
memcached_servers = linux-node2:11211
auth_type = password
project_domain_name = default
user_domain_name = default
project_name = service
username = nova
password = nova
[DEFAULT]
# ...
my_ip = 192.168.57.142  ########这个是本机IP
[DEFAULT]
# ...
use_neutron = True
firewall_driver = nova.virt.firewall.NoopFirewallDriver
[vnc]
# ...
enabled = True
vncserver_listen = 0.0.0.0
vncserver_proxyclient_address = $my_ip
novncproxy_base_url = http://linux-node2:6080/vnc_auto.html
[glance]
# ...
api_servers = http://linux-node2:9292
[oslo_concurrency]
# ...
lock_path = /var/lib/nova/tmp
[placement]
# ...
os_region_name = RegionOne
project_domain_name = Default
project_name = service
auth_type = password
user_domain_name = Default
auth_url = http://linux-node2:35357/v3
username = placement
password = nova
6.3检查是否需要硬件加速
$ egrep -c '(vmx|svm)' /proc/cpuinfo
如果为0则需要修改#vi /etc/nova/nova.conf
[libvirt]
# ...
virt_type = qemu
6.4启动服务
# systemctl enable libvirtd.service openstack-nova-compute.service
# systemctl start libvirtd.service openstack-nova-compute.service
6.5验证(node2 主节点操作)
将计算节点添加到单元数据库¶(在主节点操作)
su -s /bin/sh -c "nova-manage cell_v2 discover_hosts --verbose" nova

Found 2 cell mappings.
Skipping cell0 since it does not contain hosts.
Getting compute nodes from cell 'cell1': ad5a5985-a719-4567-98d8-8d148aaae4bc
Found 1 computes in cell: ad5a5985-a719-4567-98d8-8d148aaae4bc
Checking host mapping for compute host 'linux-node1': fe58ddc1-1d65-4f87-9456-bc040dc106b3
Creating host mapping for compute host 'linux-node1': fe58ddc1-1d65-4f87-9456-bc040dc106b3
查看comput节点
$ openstack compute service list

+----+--------------------+------------+----------+---------+-------+----------------------------+
| Id | Binary             | Host       | Zone     | Status  | State | Updated At                 |
+----+--------------------+------------+----------+---------+-------+----------------------------+
|  1 | nova-consoleauth   | controller | internal | enabled | up    | 2016-02-09T23:11:15.000000 |
|  2 | nova-scheduler     | controller | internal | enabled | up    | 2016-02-09T23:11:15.000000 |
|  3 | nova-conductor     | controller | internal | enabled | up    | 2016-02-09T23:11:16.000000 |
|  4 | nova-compute       | compute1   | nova     | enabled | up    | 2016-02-09T23:11:20.000000 |
+----+--------------------+------------+----------+---------+-------+----------------------------+
查看catalog
$ openstack catalog list
+-----------+-----------+-----------------------------------------+
| Name      | Type      | Endpoints                               |
+-----------+-----------+-----------------------------------------+
| keystone  | identity  | RegionOne                               |
|           |           |   public: http://linux-node2:5000/v3/    |
|           |           | RegionOne                               |
|           |           |   internal: http://linux-node2:5000/v3/  |
|           |           | RegionOne                               |
|           |           |   admin: http://linux-node2:35357/v3/    |
|           |           |                                         |
| glance    | image     | RegionOne                               |
|           |           |   admin: http://linux-node2:9292         |
|           |           | RegionOne                               |
|           |           |   public: http://linux-node2:9292        |
|           |           | RegionOne                               |
|           |           |   internal: http://linux-node2:9292      |
|           |           |                                         |
| nova      | compute   | RegionOne                               |
|           |           |   admin: h http://linux-node2:8774/v2.1    |
|           |           | RegionOne                               |
|           |           |   internal: http://linux-node2:8774/v2.1 |
|           |           | RegionOne                               |
|           |           |   public: http://linux-node2:8774/v2.1   |
|           |           |                                         |
| placement | placement | RegionOne                               |
|           |           |   public: http://linux-node2:8778        |
|           |           | RegionOne                               |
|           |           |   admin: http://linux-node2:8778         |
|           |           | RegionOne                               |
|           |           |   internal: http://linux-node2:8778      |
|           |           |                                         |
+-----------+-----------+-----------------------------------------+
列出Image服务中的图像以验证与Image服务的连接性:
$ openstack image list

+--------------------------------------+-------------+-------------+
| ID                                   | Name        | Status      |
+--------------------------------------+-------------+-------------+
| 9a76d9f9-9620-4f2e-8c69-6c5691fae163 | cirros      | active      |
+--------------------------------------+-------------+-------------+
检查单元格和放置API正在成功工作:
# nova-status upgrade check

+---------------------------+
| Upgrade Check Results     |
+---------------------------+
| Check: Cells v2           |
| Result: Success           |
| Details: None             |
+---------------------------+
| Check: Placement API      |
| Result: Success           |
| Details: None             |
+---------------------------+
| Check: Resource Providers |
| Result: Success           |
| Details: None             |
+---------------------------+
七、网络节点一(node2 主控制节点操作)
7.1 设置mysql
$ mysql -u root –p
MariaDB [(none)] CREATE DATABASE neutron;
MariaDB [(none)]> GRANT ALL PRIVILEGES ON neutron.* TO 'neutron'@'localhost' \
  IDENTIFIED BY 'neutron';
MariaDB [(none)]> GRANT ALL PRIVILEGES ON neutron.* TO 'neutron'@'%' \
  IDENTIFIED BY 'neutron';
7.2创建服务凭据
在admin的环境下
$ . admin-openrc
$ openstack user create --domain default --password-prompt neutron

User Password: neutron  #密码
Repeat User Password: neutron  #密码
+---------------------+----------------------------------+
| Field               | Value                            |
+---------------------+----------------------------------+
| domain_id           | default                          |
| enabled             | True                             |
| id                  | fdb0f541e28141719b6a43c8944bf1fb |
| name                | neutron                          |
| options             | {}                               |
| password_expires_at | None                             |
+---------------------+----------------------------------+
加入到admin组
$ openstack role add --project service --user neutron admin
创建neutron 服务实体
$ openstack service create --name neutron \
  --description "OpenStack Networking" network
创建neutron API
$ openstack endpoint create --region RegionOne \
  network public http://linux-node2:9696
$ openstack endpoint create --region RegionOne \
  network internal http://linux-node2:9696
$ openstack endpoint create --region RegionOne \
  network admin http://linux-node2:9696
7.3配置网络选项(这里我选用的是网络1 的配置)
您可以使用选项1和2所代表的两种体系结构之一来部署网络服务。
选项1部署了最简单的架构,只支持将实例连接到提供者(外部)网络。没有自助服务(专用)网络,
路由器或浮动IP地址。只有admin或其他特权用户才能管理提供商网络。
选项2增加了选项1,其中第三层服务支持将实例附加到自助服务网络。这个demo或其他非特权用户可以管理自助服务网络,
包括在自助服务和提供商网络之间提供连接的路由器。此外,浮动IP地址还提供与使用来自外部网络(如Internet)的自助服务网络的实例的连接。
自助服务网络通常使用覆盖网络。覆盖网络协议(如VXLAN)包含额外的标头,这些标头会增加开销并减少有效负载或用户数据的可用空间。
在不了解虚拟网络基础架构的情况下,实例将尝试使用1500字节的默认以太网最大传输单元(MTU)发送数据包。
网络服务通过DHCP自动为实例提供正确的MTU值。但是,某些云图像不使用DHCP或忽略DHCP MTU选项并需要使用元数据或脚本进行配置。
7.4 安装网络openstack-neutron
# yum install openstack-neutron openstack-neutron-ml2 \
  openstack-neutron-linuxbridge ebtables
7.5 编辑/etc/neutron/neutron.conf
[database]
# ...
connection = mysql://neutron:neutron@linux-node2/neutron
[DEFAULT]
# ...
core_plugin = ml2
service_plugins =
transport_url = rabbit://openstack:openstack@linux-node2
auth_strategy = keystone
notify_nova_on_port_status_changes = true
notify_nova_on_port_data_changes = true
[keystone_authtoken]
# ...
auth_uri = http://linux-node2:5000
auth_url = http://linux-node2:35357
memcached_servers = linux-node2:11211
auth_type = password
project_domain_name = default
user_domain_name = default
project_name = service
username = neutron
password = neutron  ######这个密码是上面设置的密码
[nova]
# ...
auth_url = http://linux-node2:35357
auth_type = password
project_domain_name = default
user_domain_name = default
region_name = RegionOne
project_name = service
username = nova
password = nova  ####注意这个是nova设置的密码
[oslo_concurrency]
# ...
lock_path = /var/lib/neutron/tmp
7.6配置模块化层2(ML2)插件(/etc/neutron/plugins/ml2/ml2_conf.ini)
编辑配置文件设置如下:
[ml2]
type_drivers = flat,vlan
tenant_network_types =
mechanism_drivers = linuxbridge
[ml2_type_flat]
flat_networks = provider
[securitygroup]
enable_ipset = true
7.7配置Linux网桥代理(/etc/neutron/plugins/ml2/linuxbridge_agent.ini)
编辑配置文件设置如下:
[linux_bridge]
physical_interface_mappings = provider:eth1  ####这个是为底层实现网络的网络接口(我这里用了eth1)
[vxlan]
enable_vxlan = false
[securitygroup]
# ...
enable_security_group = true
firewall_driver = neutron.agent.linux.iptables_firewall.IptablesFirewallDriver
7.8配置DHCP代理(/etc/neutron/dhcp_agent.ini)
[DEFAULT]
#...
interface_driver  =  linuxbridge
dhcp_driver  =  neutron.agent.linux.dhcp.Dnsmasq
enable_isolated_metadata  =  true
7.9配置计算服务以使用网络服务(/etc/nova/nova.conf)
在该[neutron]部分中,配置访问参数,启用元数据代理并配置密钥:
[neutron]
#...
url  =  http://linux-node2:9696
auth_url  =  http://linux-node2:35357
auth_type  =  password
project_domain_name  =  default
user_domain_name  =  default
region_name  =  RegionOne
project_name  =  service
username  =  neutron
password  = neutron      ###在身份识别服务中为用户选择的密码。
service_metadata_proxy  =  true
metadata_proxy_shared_secret  =  neutron     #  #为元数据代理选择的密码。
创建扩展链接
# ln -s /etc/neutron/plugins/ml2/ml2_conf.ini /etc/neutron/plugin.ini
7.10同步数据库
# su -s /bin/sh -c "neutron-db-manage --config-file /etc/neutron/neutron.conf \
  --config-file /etc/neutron/plugins/ml2/ml2_conf.ini upgrade head" neutron
7.10 启动服务
重新启动计算API服务:
重新启动计算API服务:
# systemctl restart openstack-nova-api.service
启动网络服务并将其配置为在系统引导时启动。
# systemctl enable neutron-server.service \
  neutron-linuxbridge-agent.service neutron-dhcp-agent.service \
  neutron-metadata-agent.service
# systemctl start neutron-server.service \
  neutron-linuxbridge-agent.service neutron-dhcp-agent.service \
  neutron-metadata-agent.service
八、网络节点二、(node1 计算节点操作)
8.1 安装openstack-neutron
# yum install openstack-neutron-linuxbridge ebtables ipset
8.2配置通用组件(/etc/neutron/neutron.conf)
修改如下配置文件:
[DEFAULT]
transport_url = rabbit://openstack:openstack@linux-node2
auth_strategy = keystone
[keystone_authtoken]
# ...
auth_uri = http://linux-node2:5000
auth_url = http://linux-node2:35357
memcached_servers =linux-node2:11211
auth_type = password
project_domain_name = default
user_domain_name = default
project_name = service
username = neutron
password = neutron
[oslo_concurrency]
# ...
lock_path = /var/lib/neutron/tmp
8.3配置计算服务以使用网络服务(/etc/nova/nova.conf)
在该[neutron]部分中,配置访问参数:
[neutron]
#...
url  =  http://linux-node2:9696
auth_url  =  http://linux-node2:35357
auth_type  =  password
project_domain_name  =  default
user_domain_name  =  default
region_name  =  RegionOne
project_name  =  service
username  =  neutron
password  =  neutron
8.4配置Linux网桥代理(/etc/neutron/plugins/ml2/linuxbridge_agent.ini)
编辑文件修改如下配置:
[linux_bridge]
physical_interface_mappings = provider:eht1 #这里是为底层服务的网卡名称
[vxlan]
enable_vxlan = false
[securitygroup]
# ...
enable_security_group = true
firewall_driver = neutron.agent.linux.iptables_firewall.IptablesFirewallDriver
8.5 启动服务
重启一下openstack-nova-compute
# systemctl restart openstack-nova-compute.service
启动Linux桥代理并将其配置为在系统引导时启动:
# systemctl enable neutron-linuxbridge-agent.service
# systemctl start neutron-linuxbridge-agent.service
8.6 验证操作
1.运行管理员环境
$ . admin-openrc
2.查看网络
$ openstack extension list --network

+---------------------------+---------------------------+----------------------------+
| Name                      | Alias                     | Description                |
+---------------------------+---------------------------+----------------------------+
| Default Subnetpools       | default-subnetpools       | Provides ability to mark   |
|                           |                           | and use a subnetpool as    |
|                           |                           | the default                |
| Availability Zone         | availability_zone         | The availability zone      |
|                           |                           | extension.                 |
| Network Availability Zone | network_availability_zone | Availability zone support  |
|                           |                           | for network.               |
| Port Binding              | binding                   | Expose port bindings of a  |
|                           |                           | virtual port to external   |
|                           |                           | application                |
| agent                     | agent                     | The agent management       |
|                           |                           | extension.                 |
| Subnet Allocation         | subnet_allocation         | Enables allocation of      |
|                           |                           | subnets from a subnet pool |
| DHCP Agent Scheduler      | dhcp_agent_scheduler      | Schedule networks among    |
|                           |                           | dhcp agents                |
| Tag support               | tag                       | Enables to set tag on      |
|                           |                           | resources.                 |
| Neutron external network  | external-net              | Adds external network      |
|                           |                           | attribute to network       |
|                           |                           | resource.                  |
| Neutron Service Flavors   | flavors                   | Flavor specification for   |
|                           |                           | Neutron advanced services  |
| Network MTU               | net-mtu                   | Provides MTU attribute for |
|                           |                           | a network resource.        |
| Network IP Availability   | network-ip-availability   | Provides IP availability   |
|                           |                           | data for each network and  |
|                           |                           | subnet.                    |
| Quota management support  | quotas                    | Expose functions for       |
|                           |                           | quotas management per      |
|                           |                           | tenant                     |
| Provider Network          | provider                  | Expose mapping of virtual  |
|                           |                           | networks to physical       |
|                           |                           | networks                   |
| Multi Provider Network    | multi-provider            | Expose mapping of virtual  |
|                           |                           | networks to multiple       |
|                           |                           | physical networks          |
| Address scope             | address-scope             | Address scopes extension.  |
| Subnet service types      | subnet-service-types      | Provides ability to set    |
|                           |                           | the subnet service_types   |
|                           |                           | field                      |
| Resource timestamps       | standard-attr-timestamp   | Adds created_at and        |
|                           |                           | updated_at fields to all   |
|                           |                           | Neutron resources that     |
|                           |                           | have Neutron standard      |
|                           |                           | attributes.                |
| Neutron Service Type      | service-type              | API for retrieving service |
| Management                |                           | providers for Neutron      |
|                           |                           | advanced services          |
| Tag support for           | tag-ext                   | Extends tag support to     |
| resources: subnet,        |                           | more L2 and L3 resources.  |
| subnetpool, port, router  |                           |                            |
| Neutron Extra DHCP opts   | extra_dhcp_opt            | Extra options              |
|                           |                           | configuration for DHCP.    |
|                           |                           | For example PXE boot       |
|                           |                           | options to DHCP clients    |
|                           |                           | can be specified (e.g.     |
|                           |                           | tftp-server, server-ip-    |
|                           |                           | address, bootfile-name)    |
| Resource revision numbers | standard-attr-revisions   | This extension will        |
|                           |                           | display the revision       |
|                           |                           | number of neutron          |
|                           |                           | resources.                 |
| Pagination support        | pagination                | Extension that indicates   |
|                           |                           | that pagination is         |
|                           |                           | enabled.                   |
| Sorting support           | sorting                   | Extension that indicates   |
|                           |                           | that sorting is enabled.   |
| security-group            | security-group            | The security groups        |
|                           |                           | extension.                 |
| RBAC Policies             | rbac-policies             | Allows creation and        |
|                           |                           | modification of policies   |
|                           |                           | that control tenant access |
|                           |                           | to resources.              |
| standard-attr-description | standard-attr-description | Extension to add           |
|                           |                           | descriptions to standard   |
|                           |                           | attributes                 |
| Port Security             | port-security             | Provides port security     |
| Allowed Address Pairs     | allowed-address-pairs     | Provides allowed address   |
|                           |                           | pairs                      |
| project_id field enabled  | project-id                | Extension that indicates   |
|                           |                           | that project_id field is   |
|                           |                           | enabled.                   |
+---------------------------+---------------------------+----------------------------+
1. 查看网络
3.$ openstack network agent list
4.
5.+--------------------------------------+--------------------+------------+-------------------+-------+-------+---------------------------+
6.| ID                                   | Agent Type         | Host       | Availability Zone | Alive | State | Binary                    |
7.+--------------------------------------+--------------------+------------+-------------------+-------+-------+---------------------------+
8.| 0400c2f6-4d3b-44bc-89fa-99093432f3bf | Metadata agent     | controller | None              | True  | UP    | neutron-metadata-agent    |
9.| 83cf853d-a2f2-450a-99d7-e9c6fc08f4c3 | DHCP agent         | controller | nova              | True  | UP    | neutron-dhcp-agent        |
10.| ec302e51-6101-43cf-9f19-88a78613cbee | Linux bridge agent | compute    | None              | True  | UP    | neutron-linuxbridge-agent |
11.| fcb9bc6e-22b1-43bc-9054-272dd517d025 | Linux bridge agent | controller | None              | True  | UP    | neutron-linuxbridge-agent |
12.+--------------------------------------+--------------------+------------+-------------------+-------+-------+---------------------------+
九、Dashboard(node2控制节点操作)
9.1 安装
# yum install openstack-dashboard
9.2配置主配置文件(/etc/openstack-dashboard/local_settings)
OPENSTACK_HOST = "linux-node2"
ALLOWED_HOSTS = ['*']
SESSION_ENGINE = 'django.contrib.sessions.backends.cache'

CACHES = {
    'default': {
         'BACKEND': 'django.core.cache.backends.memcached.MemcachedCache',
         'LOCATION': 'controller:11211',
    }
}
OPENSTACK_KEYSTONE_URL = "http://%s:5000/v3" % OPENSTACK_HOST
OPENSTACK_KEYSTONE_MULTIDOMAIN_SUPPORT = True


OPENSTACK_API_VERSIONS = {
    "identity": 3,
    "image": 2,
    "volume": 2,
}
OPENSTACK_KEYSTONE_DEFAULT_DOMAIN = "Default"
OPENSTACK_KEYSTONE_DEFAULT_ROLE = "user"
OPENSTACK_NEUTRON_NETWORK = {
    ...
    'enable_router': False,
    'enable_quotas': False,
    'enable_distributed_router': False,
    'enable_ha_router': False,
    'enable_lb': False,
    'enable_firewall': False,
    'enable_vpn': False,
    'enable_fip_topology_check': False,
}
TIME_ZONE = "Asia/Shanghai "
9.4重启服务
# systemctl restart httpd.service memcached.service
9.5 访问openstack
http://192.168.57.145/dashboard/auth/login/

十、启动第一个实例
10.1 创建第一个实例
首先是我选用的网络类型是提供商网络()
创建一个环境
openstack flavor create --id 0 --vcpus 1 --ram 1024 --disk 10 m1.nano
##########
ID表示为唯一识别的标志
--ram 表示内存的大小
--disk 10 代表存储空间为10G
M1.nano 为名字
10.2生成一个密钥对
$ . demo-openrc
$ ssh-keygen -q -N ""
$ openstack keypair create --public-key ~/.ssh/id_rsa.pub mykey
+-------------+-------------------------------------------------+
| Field       | Value                                           |
+-------------+-------------------------------------------------+
| fingerprint | ee:3d:2e:97:d4:e2:6a:54:6d:0d:ce:43:39:2c:ba:4d |
| name        | mykey                                           |
| user_id     | 58126687cbcc4888bfa9ab73a2256f27                |
+-------------+-------------------------------------------------+
查看
$ openstack keypair list

+-------+-------------------------------------------------+
| Name  | Fingerprint                                     |
+-------+-------------------------------------------------+
| mykey | ee:3d:2e:97:d4:e2:6a:54:6d:0d:ce:43:39:2c:ba:4d |
+-------+-------------------------------------------------+
10.3创建一个icmp
$ openstack security group rule create --proto icmp default
添加规则
$ openstack security group rule create --proto tcp --dst-port 22 default
10.4创建网络
$ . admin-openrc
$ openstack network create  --share --external \
  --provider-physical-network provider \
  --provider-network-type flat provider
该--share选项允许所有项目使用虚拟网络。
该--external选项将虚拟网络定义为外部。如果你想创建一个内部网络,你可以使用--internal。默认值是internal。
10.5创建子网
$ openstack subnet create --network provider \
  --allocation-pool start=192.168.57.100,end=192.168.57.200 \
  --dns-nameserver 202.101.224.68 --gateway 192.168.57.2 \
  --subnet-range 192.168.57.0/24 provider
10.6创建虚拟机
查看有那些配置选项
[root@linux-node2 ~]# openstack flavor list
+----+------------+------+------+-----------+-------+-----------+
| ID | Name       |  RAM | Disk | Ephemeral | VCPUs | Is Public |
+----+------------+------+------+-----------+-------+-----------+
| 0  | m1.nano    | 1024 |    1 |         0 |     1 | True      |
| 10 | liang.nano | 1024 |    5 |         0 |     1 | True      |
| 2  | m.nano     | 1024 |   10 |         0 |    10 | True      |
| 3  | m2.nano    | 1024 |   10 |         0 |     1 | True      |
| 4  | m4.nano    | 1024 |   10 |         0 |     1 | True      |
+----+------------+------+------+-----------+-------+-----------+
查看可以用的镜像
[root@linux-node2 ~]# openstack image list
+--------------------------------------+--------------------+--------+
| ID                                   | Name               | Status |
+--------------------------------------+--------------------+--------+
| 470802c8-3385-4e08-b069-ace2d3f8e914 | Centos7            | active |
| 984e73aa-1faf-40c6-88ee-5532ab7cf41f | cirros             | active |
| 742c7273-56f2-43e2-8816-98f980fd97d7 | windows Server2003 | active |
+--------------------------------------+--------------------+--------+
查看可用网络
[root@linux-node2 ~]# openstack network list
+--------------------------------------+----------+--------------------------------------+
| ID                                   | Name     | Subnets                              |
+--------------------------------------+----------+--------------------------------------+
| 161a2f1e-5c2d-418a-91a3-7a1d9aa35200 | provider | 80695e60-cd51-4385-8af3-cd792f3a77ef |
+--------------------------------------+----------+--------------------------------------+
[root@linux-node2 ~]# openstack security group list
+--------------------------------------+---------+-------------+----------------------------------+
| ID                                   | Name    | Description | Project                          |
+--------------------------------------+---------+-------------+----------------------------------+
| 593ef5a3-b48b-483e-8753-aabd81afae8a | default | 缺省安全组  | 2534c30f191a40038947f238c534c20d |
| 73b40ecf-1bfb-49d1-9382-05e3a2d0f577 | liang   | adasd       | 497f3c89978641479a56bb6954b6da7d |
+--------------------------------------+---------+-------------+----------------------------------+
创建虚拟机
[root@linux-node2 ~]# openstack server create --flavor m1.nano --image cirros \
> --nic net-id=3de76652-72aa-4638-9c31-7465055db1f3 --security-group default \
> --key-name mykey provider-instance
+-----------------------------+-----------------------------------------------+
| Field                       | Value                                         |
+-----------------------------+-----------------------------------------------+
| OS-DCF:diskConfig           | MANUAL                                        |
| OS-EXT-AZ:availability_zone |                                               |
| OS-EXT-STS:power_state      | NOSTATE                                       |
| OS-EXT-STS:task_state       | scheduling                                    |
| OS-EXT-STS:vm_state         | building                                      |
| OS-SRV-USG:launched_at      | None                                          |
| OS-SRV-USG:terminated_at    | None                                          |
| accessIPv4                  |                                               |
| accessIPv6                  |                                               |
| addresses                   |                                               |
| adminPass                   | LYFNpN5rHRnx                                  |
| config_drive                |                                               |
| created                     | 2018-01-03T07:39:13Z                          |
| flavor                      | m1.nano (0)                                   |
| hostId                      |                                               |
| id                          | 00d4afc5-266f-4852-9c7f-b86c2a5ec3f3          |
| image                       | cirros (984e73aa-1faf-40c6-88ee-5532ab7cf41f) |
| key_name                    | mykey                                         |
| name                        | provider-instance                             |
| progress                    | 0                                             |
| project_id                  | 497f3c89978641479a56bb6954b6da7d              |
| properties                  |                                               |
| security_groups             | name='ff0181e2-596b-4e1b-87d9-90647674194b'   |
| status                      | BUILD                                         |
| updated                     | 2018-01-03T07:39:13Z                          |
| user_id                     | 1df20bd306664a498a6c9d6af66263a8              |
| volumes_attached            |                                               |
+-----------------------------+-----------------------------------------------+
查看虚拟机(状态从改变BUILD到ACTIVE时构建过程成功完成。)
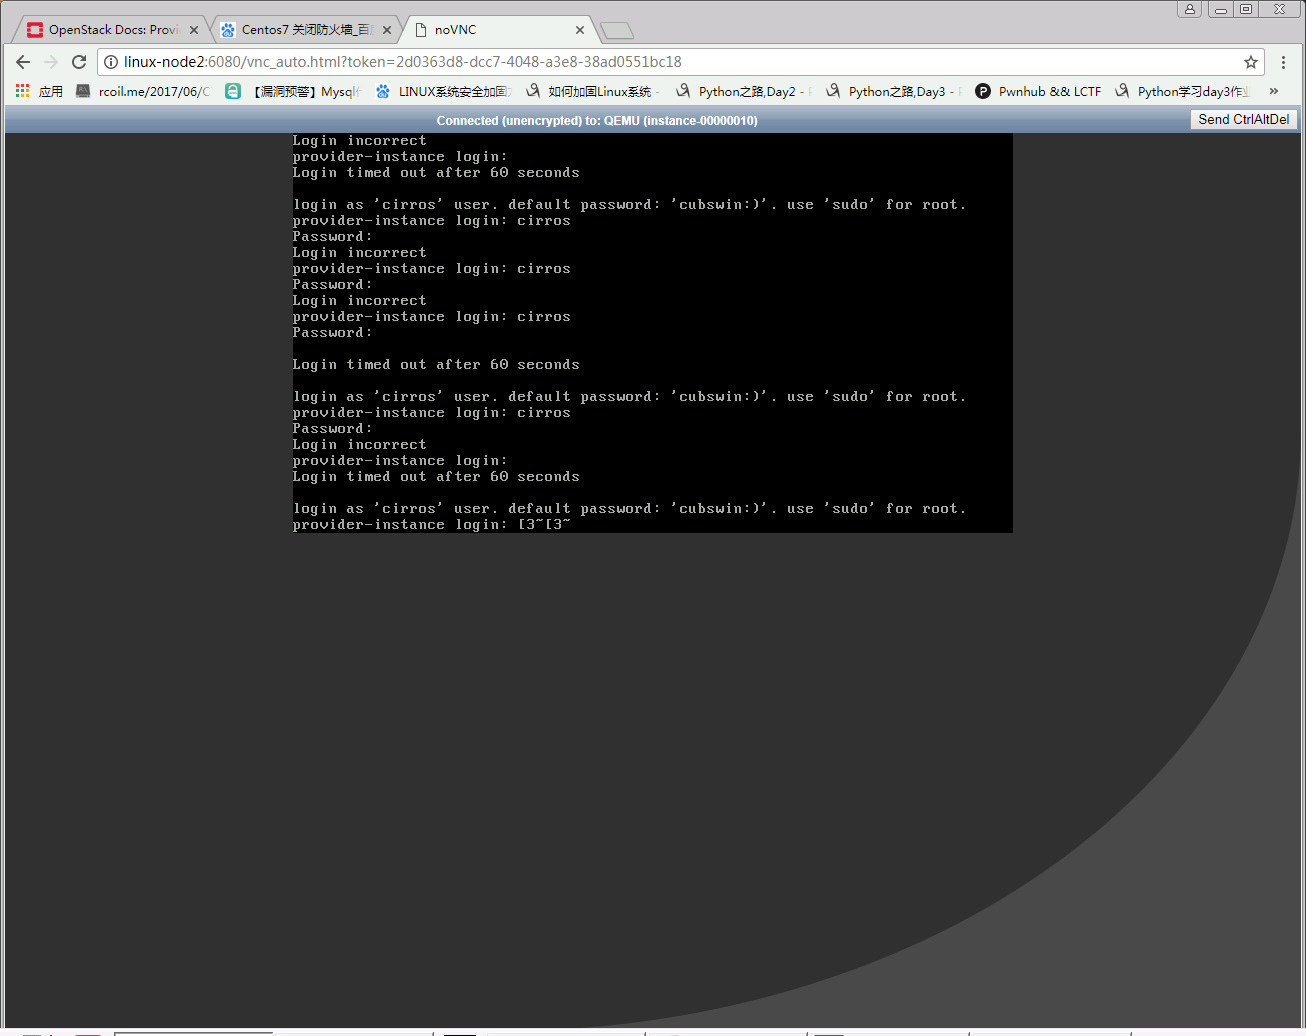
[root@linux-node2 ~]# openstack server list
+--------------------------------------+-------------------+--------+----------+--------+---------+
| ID                                   | Name              | Status | Networks | Image  | Flavor  |
+--------------------------------------+-------------------+--------+----------+--------+---------+
| 00d4afc5-266f-4852-9c7f-b86c2a5ec3f3 | provider-instance | BUILD  |          | cirros | m1.nano |
+--------------------------------------+-------------------+--------+----------+--------+---------+
[root@linux-node2 ~]# openstack server list
+--------------------------------------+-------------------+--------+-------------------------+--------+---------+
| ID                                   | Name              | Status | Networks                | Image  | Flavor  |
+--------------------------------------+-------------------+--------+-------------------------+--------+---------+
| 00d4afc5-266f-4852-9c7f-b86c2a5ec3f3 | provider-instance | ACTIVE | provider=192.168.57.105 | cirros | m1.nano |
+--------------------------------------+-------------------+--------+-------------------------+--------+---------+
查看虚拟机的VNC的URL
[root@linux-node2 ~]# openstack console url show provider-instance
+-------+----------------------------------------------------------------------------------+
| Field | Value                                                                            |
+-------+----------------------------------------------------------------------------------+
| type  | novnc                                                                            |
| url   | http://linux-node2:6080/vnc_auto.html?token=2d0363d8-dcc7-4048-a3e8-38ad0551bc18 |
+-------+----------------------------------------------------------------------------------+
10.7网页查看
10.8 测试网络连通性
在openstack server list中查看的IP地址为192.168.57.105
现在在node1 node2 进行测试
Node2 测试结果
[root@linux-node2 ~]# ping -c 4 192.168.57.105
PING 192.168.57.105 (192.168.57.105) 56(84) bytes of data.
64 bytes from 192.168.57.105: icmp_seq=1 ttl=64 time=2.48 ms
64 bytes from 192.168.57.105: icmp_seq=2 ttl=64 time=2.23 ms
64 bytes from 192.168.57.105: icmp_seq=3 ttl=64 time=1.84 ms
64 bytes from 192.168.57.105: icmp_seq=4 ttl=64 time=2.64 ms

--- 192.168.57.105 ping statistics ---
4 packets transmitted, 4 received, 0% packet loss, time 3005ms
rtt min/avg/max/mdev = 1.841/2.299/2.642/0.305 ms
node1 测试结果
[root@linux-node1 neutron]#  ping -c 4 192.168.57.105
PING 192.168.57.105 (192.168.57.105) 56(84) bytes of data.
64 bytes from 192.168.57.105: icmp_seq=1 ttl=64 time=1.33 ms
64 bytes from 192.168.57.105: icmp_seq=2 ttl=64 time=0.873 ms
64 bytes from 192.168.57.105: icmp_seq=3 ttl=64 time=1.22 ms
64 bytes from 192.168.57.105: icmp_seq=4 ttl=64 time=2.47 ms

--- 192.168.57.105 ping statistics ---
4 packets transmitted, 4 received, 0% packet loss, time 3004ms
rtt min/avg/max/mdev = 0.873/1.478/2.476/0.602 ms
10.9 Ssh连接测试一下
[root@linux-node2 ~]# ssh cirros@192.168.57.105
The authenticity of host '192.168.57.105 (192.168.57.105)' can't be established.
RSA key fingerprint is SHA256:7Qa9JtqTy/3uqoJKw7doB6hC93pHEuHbv+e6xpgPGD8.
RSA key fingerprint is MD5:61:64:aa:1a:94:f7:dc:26:58:f5:cf:fd:ba:48:66:b5.
Are you sure you want to continue connecting (yes/no)? yes
Warning: Permanently added '192.168.57.105' (RSA) to the list of known hosts.

$ ifconfig
eth0      Link encap:Ethernet  HWaddr FA:16:3E:27:D7:37
          inet addr:192.168.57.105  Bcast:192.168.57.255  Mask:255.255.255.0
          inet6 addr: fe80::f816:3eff:fe27:d737/64 Scope:Link
          UP BROADCAST RUNNING MULTICAST  MTU:1500  Metric:1
          RX packets:364 errors:0 dropped:0 overruns:0 frame:0
          TX packets:249 errors:0 dropped:0 overruns:0 carrier:0
          collisions:0 txqueuelen:1000
          RX bytes:33991 (33.1 KiB)  TX bytes:26215 (25.6 KiB)

lo        Link encap:Local Loopback
          inet addr:127.0.0.1  Mask:255.0.0.0
          inet6 addr: ::1/128 Scope:Host
          UP LOOPBACK RUNNING  MTU:16436  Metric:1
          RX packets:0 errors:0 dropped:0 overruns:0 frame:0
          TX packets:0 errors:0 dropped:0 overruns:0 carrier:0
          collisions:0 txqueuelen:0
          RX bytes:0 (0.0 B)  TX bytes:0 (0.0 B)
十一、块存储服务(控制节点node2 操作)
11.1 数据库操作
$ mysql -u root –p
MariaDB [(none)]> CREATE DATABASE cinder;
MariaDB [(none)]> GRANT ALL PRIVILEGES ON cinder.* TO 'cinder'@'localhost' \
  IDENTIFIED BY 'cinder';
MariaDB [(none)]> GRANT ALL PRIVILEGES ON cinder.* TO 'cinder'@'%' \
  IDENTIFIED BY 'cinder';
11.2创建服务凭据
$ openstack user create --domain default --password-prompt cinder

User Password: cinder  ###密码
Repeat User Password: cinder
+---------------------+----------------------------------+
| Field               | Value                            |
+---------------------+----------------------------------+
| domain_id           | default                          |
| enabled             | True                             |
| id                  | 9d7e33de3e1a498390353819bc7d245d |
| name                | cinder                           |
| options             | {}                               |
| password_expires_at | None                             |
+---------------------+----------------------------------+
添加到admin组
$ openstack role add --project service --user cinder admin
11.3 创建cinderv2和cinderv3服务实体:
$ openstack service create --name cinderv2 \
  --description "OpenStack Block Storage" volumev2

+-------------+----------------------------------+
| Field       | Value                            |
+-------------+----------------------------------+
| description | OpenStack Block Storage          |
| enabled     | True                             |
| id          | eb9fd245bdbc414695952e93f29fe3ac |
| name        | cinderv2                         |
| type        | volumev2                         |
+-------------+----------------------------------+
$ openstack service create --name cinderv3 \
  --description "OpenStack Block Storage" volumev3

+-------------+----------------------------------+
| Field       | Value                            |
+-------------+----------------------------------+
| description | OpenStack Block Storage          |
| enabled     | True                             |
| id          | ab3bbbef780845a1a283490d281e7fda |
| name        | cinderv3                         |
| type        | volumev3                         |
+-------------+----------------------------------+
11.4建立快存储API
$ openstack endpoint create --region RegionOne \
  volumev2 public http://linux-node2:8776/v2/%\(project_id\)s

$ openstack endpoint create --region RegionOne \
  volumev2 internal http://linux-node2:8776/v2/%\(project_id\)s

$ openstack endpoint create --region RegionOne \
  volumev2 admin http://linux-node2:8776/v2/%\(project_id\)s

openstack endpoint create --region RegionOne \
  volumev3 public http://linux-node2:8776/v3/%\(project_id\)s

openstack endpoint create --region RegionOne \
  volumev3 internal http://linux-node2:8776/v3/%\(project_id\)s

openstack endpoint create --region RegionOne \
  volumev3 admin http://linux-node2:8776/v3/%\(project_id\)s
11.5 安装cinder
# yum install openstack-cinder
11.6配置cinder(/etc/cinder/cinder.conf)
[database]
connection = mysql://cinder:cinder @linux-node2/cinder
default部分
[DEFAULT] # ...
transport_url = rabbit://openstack:openstack@linux-node2
auth_strategy = keystone
my_ip = 192.168.57.145
[keystone_authtoken]
# ...
auth_uri = http://linux-node2:5000
auth_url = http://linux-node2:35357
memcached_servers = linux-node2:11211
auth_type = password
project_domain_name = default
user_domain_name = default
project_name = service
username = cinder
password = cinder
[oslo_concurrency]
# ...
lock_path = /var/lib/cinder/tmp
配置计算使用块存储
编辑/etc/nova/nova.conf文件并添加以下内容:
[cinder]
os_region_name  =  RegionOne
11.7 填充数据库
# su -s /bin/sh -c "cinder-manage db sync" cinder
11.8完成安装
重新启动计算API服务:
# systemctl restart openstack-nova-api.service
启动块存储服务并将其配置为在系统引导时启动:
# systemctl enable openstack-cinder-api.service openstack-cinder-scheduler.service
# systemctl start openstack-cinder-api.service openstack-cinder-scheduler.service
十二、块存储服务(可以新开一台机器也可以使用计算节点,我这里使用的计算节点node1)
首先添加一块硬盘50G吧。使用LVM的方式
12.1 安装lvm
# yum install lvm2
# systemctl enable lvm2-lvmetad.service
# systemctl start lvm2-lvmetad.service
12.2配置lvm
创建LVM物理卷/dev/sdb
# pvcreate /dev/sdb

Physical volume "/dev/sdb" successfully created
创建LVM卷组cinder-volumes:
# vgcreate cinder-volumes /dev/sdb

Volume group "cinder-volumes" successfully created
编辑 /etc/lvm/lvm.conf
devices {
...
filter = [ "a/sdb/", "r/.*/"]
#################################其他方式
如果您的存储节点在操作系统磁盘上使用LVM,则还必须将关联的设备添加到过滤器。例如,如果/dev/sda设备包含操作系统:
filter = [“a / sda /”,“a / sdb /”,“r /.*/”]
同样,如果计算节点在操作系统磁盘上使用LVM,则还必须修改/etc/lvm/lvm.conf这些节点上的文件中的筛选器, 使其只包含操作系统磁盘。例如,如果/dev/sda 设备包含操作系统:
filter = [“a / sda /”,“r /.*/”]
12.3安装和配置的部件
yum install openstack-cinder targetcli python-keystone
12.4配置主配置文件(/etc/cinder/cinder.conf)
[DEFAULT]
# ...
transport_url = rabbit://openstack:openstack@linux-node2
auth_strategy = keystone
my_ip = 192.168.57.142
enabled_backends = lvm
glance_api_servers = http://linux-node2:9292
[database]
# ...
connection = mysql://cinder:cinder@linux-node2/cinder
[keystone_authtoken]
# ...
auth_uri = http://linux-node2:5000
auth_url = http://linux-node2:35357
memcached_servers = linux-node2:11211
auth_type = password
project_domain_name = default
user_domain_name = default
project_name = service
username = cinder
password = cinder
########【lvm】在最后面添加###############
[lvm]
volume_driver = cinder.volume.drivers.lvm.LVMVolumeDriver
volume_group = cinder-volumes
iscsi_protocol = iscsi
iscsi_helper = lioadm
[oslo_concurrency]
# ...
lock_path = /var/lib/cinder/tmp
12.5 启动
# systemctl enable openstack-cinder-volume.service target.service
# systemctl start openstack-cinder-volume.service target.service
12.6 检查
[root@linux-node2 cinder]# admin-openrc
[root@linux-node2 cinder]# openstack volume service list
+------------------+-----------------+------+---------+-------+----------------------------+
| Binary           | Host            | Zone | Status  | State | Updated At                 |
+------------------+-----------------+------+---------+-------+----------------------------+
| cinder-scheduler | linux-node2     | nova | enabled | up    | 2018-01-02T16:11:10.000000 |
| cinder-volume    | linux-node1@lvm | nova | enabled | up    | 2018-01-02T16:11:05.000000 |
+------------------+-----------------+------+---------+-------+----------------------------+
12.7 创建块存储
创建一个10G的存储
[root@linux-node2 cinder]# openstack volume create --size 10 volume1
+---------------------+--------------------------------------+
| Field               | Value                                |
+---------------------+--------------------------------------+
| attachments         | []                                   |
| availability_zone   | nova                                 |
| bootable            | false                                |
| consistencygroup_id | None                                 |
| created_at          | 2018-01-02T15:46:13.269273           |
| description         | None                                 |
| encrypted           | False                                |
| id                  | d1b2e03b-c80a-4cde-ad25-65abab621b0c |
| migration_status    | None                                 |
| multiattach         | False                                |
| name                | volume1                              |
| properties          |                                      |
| replication_status  | None                                 |
| size                | 10                                   |
| snapshot_id         | None                                 |
| source_volid        | None                                 |
| status              | creating                             |
| type                | None                                 |
| updated_at          | None                                 |
| user_id             | 40a299a16064488facc16764cb635c12     |
+---------------------+--------------------------------------+
查看
[root@linux-node2 cinder]# openstack volume list
+--------------------------------------+---------+-----------+------+-------------+
| ID                                   | Name    | Status    | Size | Attached to |
+--------------------------------------+---------+-----------+------+-------------+
| d1b2e03b-c80a-4cde-ad25-65abab621b0c | volume1 | available |   10 |             |
+--------------------------------------+---------+-----------+------+-------------+
12.7将卷附加到实例
[root@linux-node2 cinder]# openstack server add volume provider-instance volume1
查看
[root@linux-node2 cinder]# openstack volume list
+--------------------------------------+---------+--------+------+--------------------------------------------+
| ID                                   | Name    | Status | Size | Attached to                                |
+--------------------------------------+---------+--------+------+--------------------------------------------+
| d1b2e03b-c80a-4cde-ad25-65abab621b0c | volume1 | in-use |   10 | Attached to provider-instance on /dev/vdb  |
+--------------------------------------+---------+--------+------+--------------------------------------------+
[root@linux-node2 cinder]#
十三、安装虚拟机
这里我是自己上传了一个Centos7 的镜像。像上面创建实例一样创建的。后面把硬盘添加到这个实例里面。后面启动。就有了下面的画面
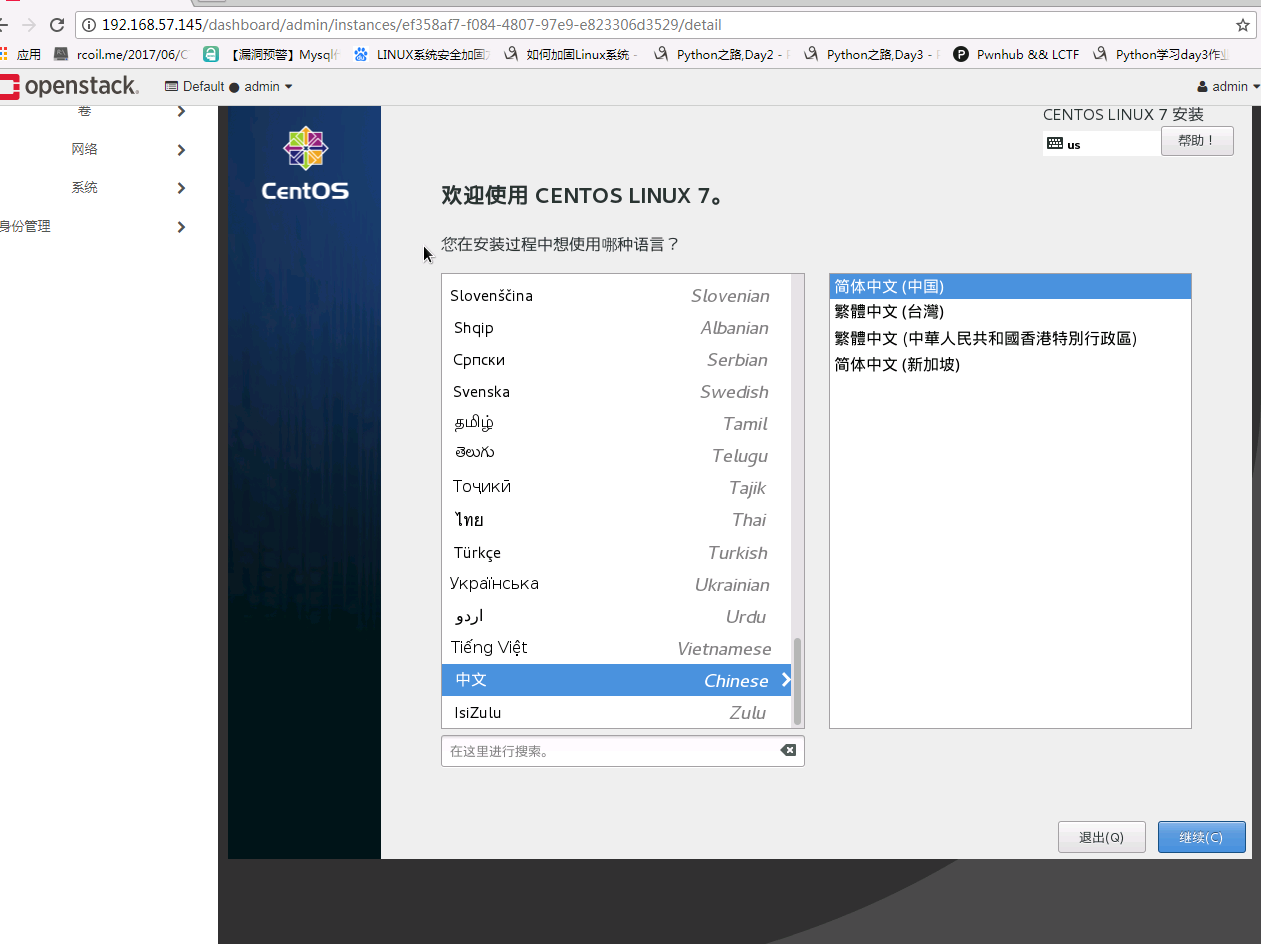
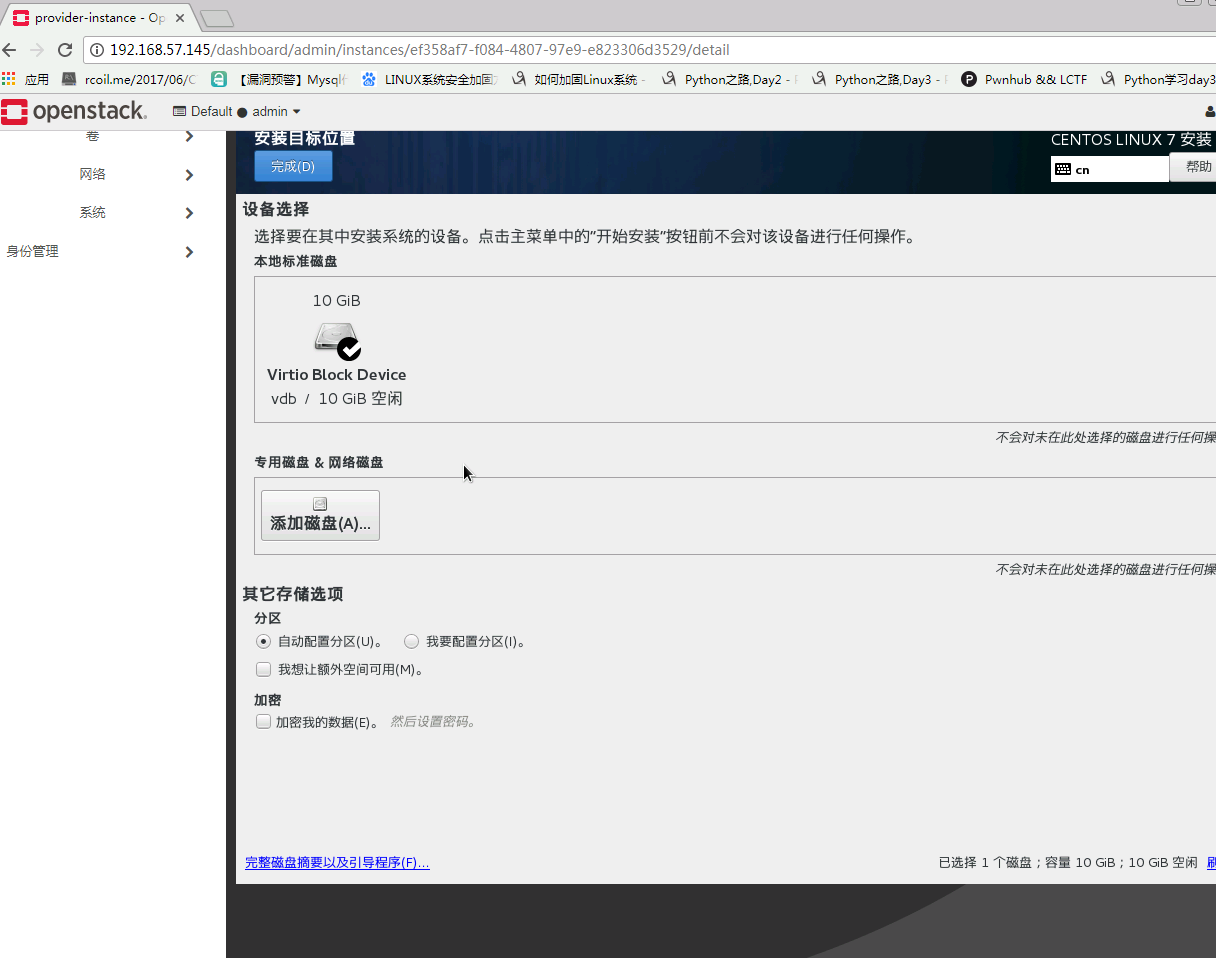
已经显示有10G硬盘了。现在可以安装系统了。我笔记本配置比较渣渣。弄起来太慢了

用VNC连接node1 的KVM就可以操作了。网页不好操作
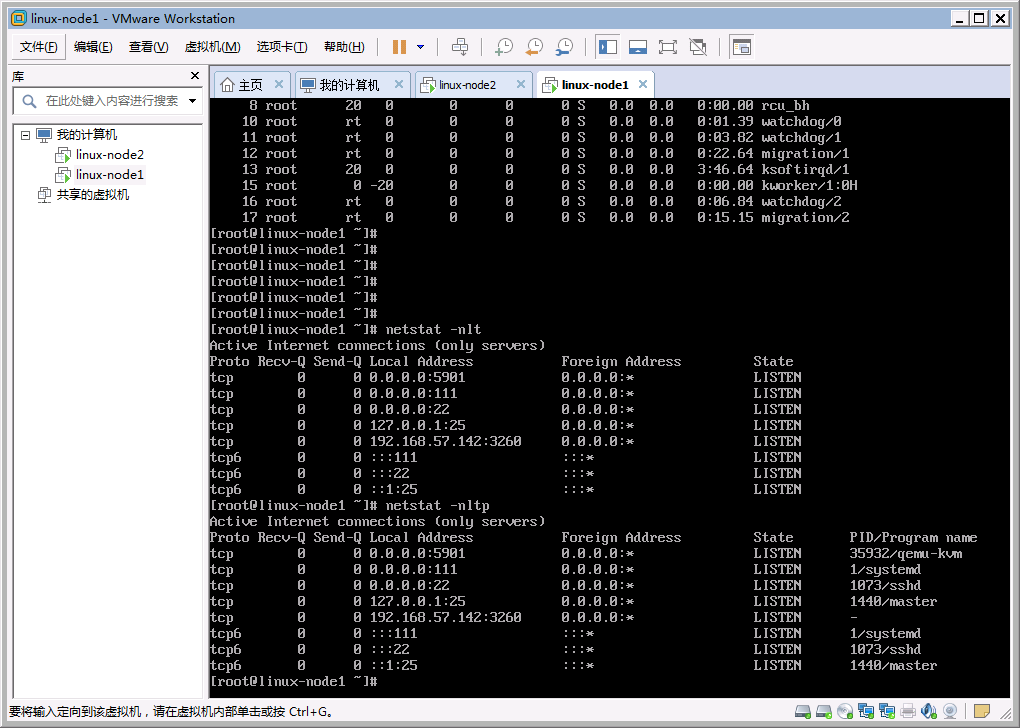
Node1 中有一个5901的进程。我们用VNC的客户端连接一下就够了

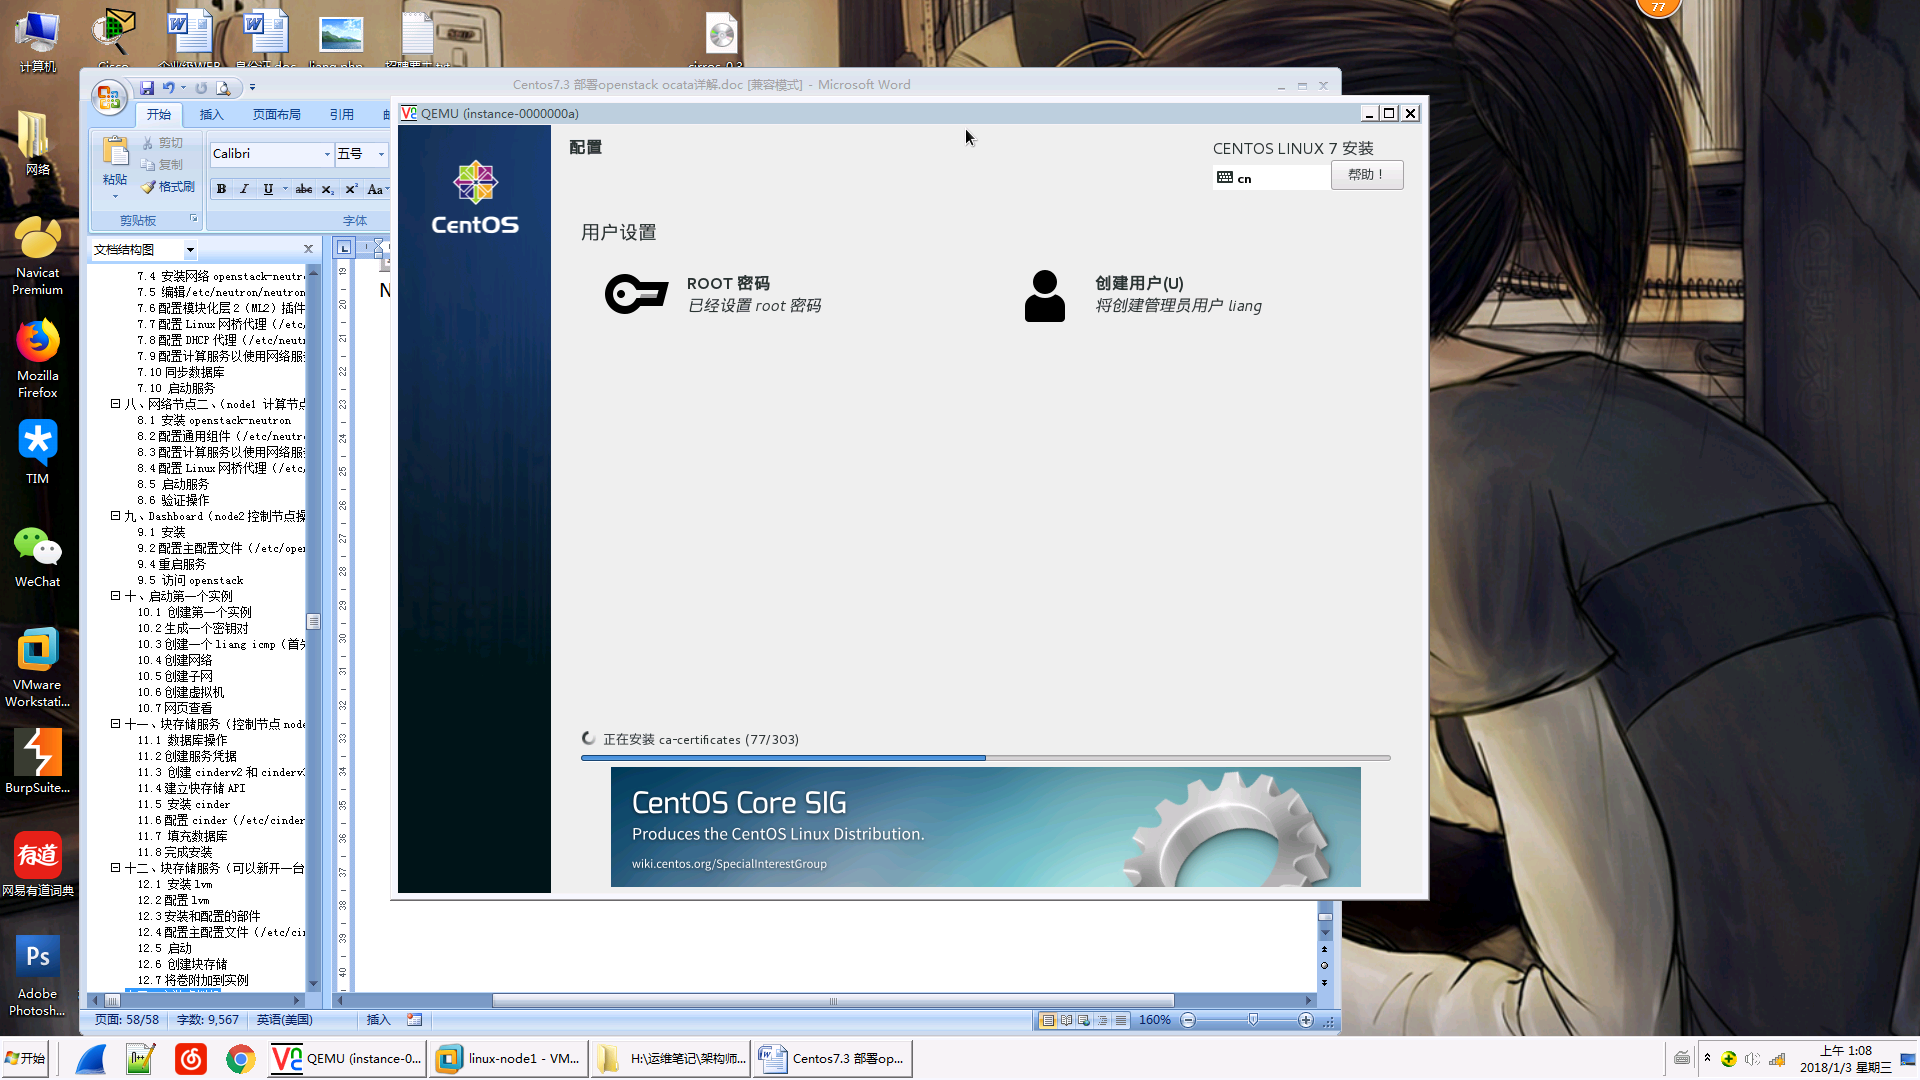
只要等它安装完就够了。